Poster board for 2020 UROP Virtual Symposium
Poster board for 2020 UROP Virtual Symposium
My idea for my virtual reality world: a jungle-themed maze (a regular maze that leads you to a jungle-like environment with wild-life and plants.
The process:

I first started with a very simple maze, I scaled a cube to make it my floor and then I incorporated walls throughout the maze, which had to be modified a lot and rotated frequently.

This was the outcome of the maze portion of the game. Since I wanted the maze to be jungle-themed I utilized environmental textures such as a grass floor and rock textured walls, as well as a couple of trees throughout the maze. The hardest part of creating the maze was getting the walls to meet up evenly, as well as making sure they were all interconnected. When trying out the game I would have to see which walls were not even and which ones had gaps. It was also difficult playing around with the directional lighting because it would create shadows which made it difficult to navigate my virtual world.
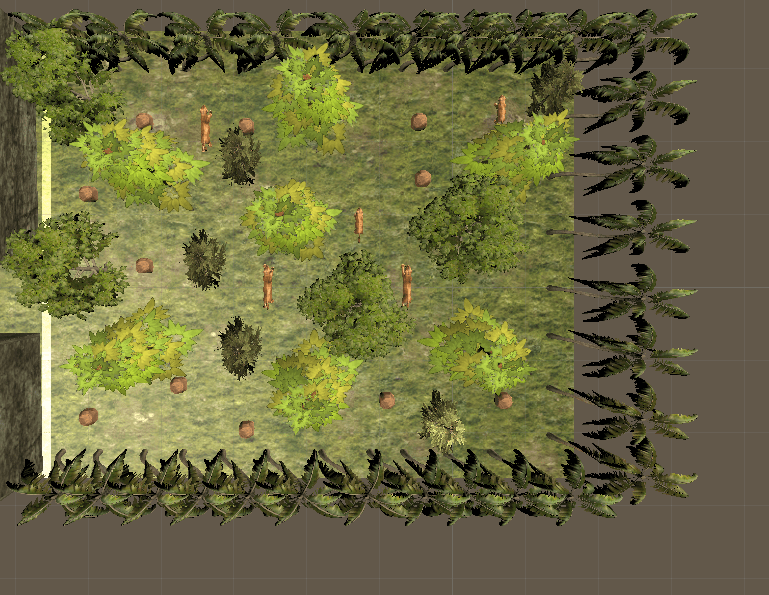

When you escape “the maze” I made a jungle-like terrain which includes a variety of wildlife and an abundance of trees. Once I got around to this portion of my project this is when I started having trouble. I kept getting a bunch of errors due to the importing of different objects from assets. I had to upgrade my unity and modify my world a little bit so that the actual game would work.
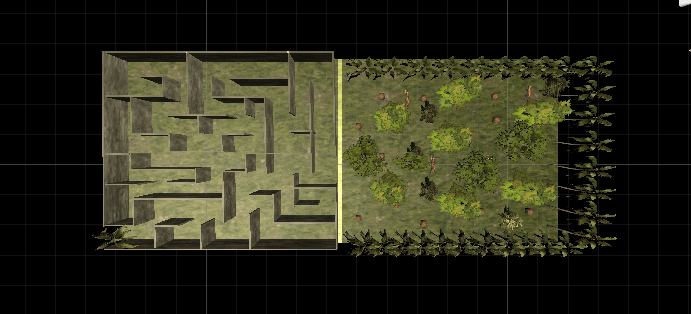
This is the final result of my project. All in all creating a virtual world was an interesting experience. Using different softwares such as Fusion 360 and Free-cad allowed me to conceptualize my world and make it easier to create a virtual reality. The experience was a bit frustrating since things had to be perfect so I would not get errors when attempting to actually play my game. Although I created a relatively simple maze, when playing the game from a different perspective it made it so much harder to navigate the maze. When playing I would frequently end up right where I started, so I included a palm tree at the start so I would know that the starting point. Since I do consider myself a “struggle bus” student, I did find it difficult to navigate the software but once I started playing around with it I was able to make my virtual reality. I am attaching the video of my friend playing with my virtual reality world down below. I made my friend play through the maze a couple of times so she could do it smoothly in the video.
I had a lot of fun throughout the semester in this class and really enjoyed all aspects of the class. Thank you so much for everything !!!!
Part A
The object I am making is a door wedge/ door stopper utilizing various designs.

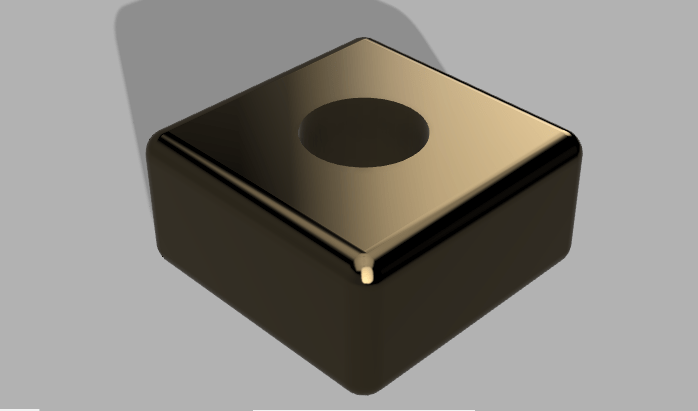
This was the first door stopper that I attempted to make. This one was fairly simple to make and did not take that much effort. I decided to make this door stopper in this particular shape because I wanted to make my name extruded and fully visible when it was wedged under the door. When the wedge is put under the door on the side, my name is fully visible. I also utilized a soft rubber material because that is what is most commonly used when making door wedges.
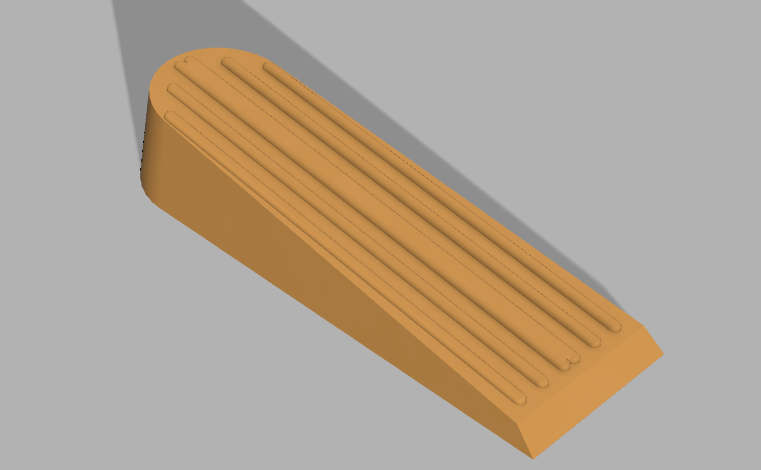
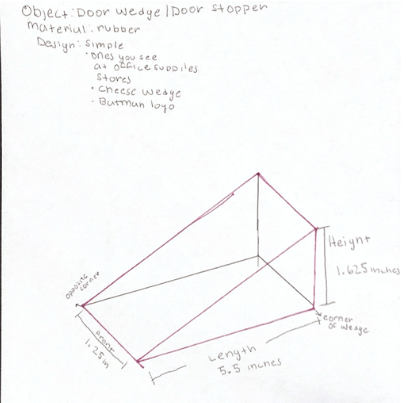
When making door wedges I decided to make one that is most commonly sold at office utilities stores or hardware places. Instead of buying one at my local hardware store, I decided to make a door wedge that resembles one that I would be able to buy. The only difficult part of making this wedge was making the textures on the top of the wedge and it included making very precise measurements so they would line up accordingly. I am pretty happy with this design because it relatively came out how I wanted it to.

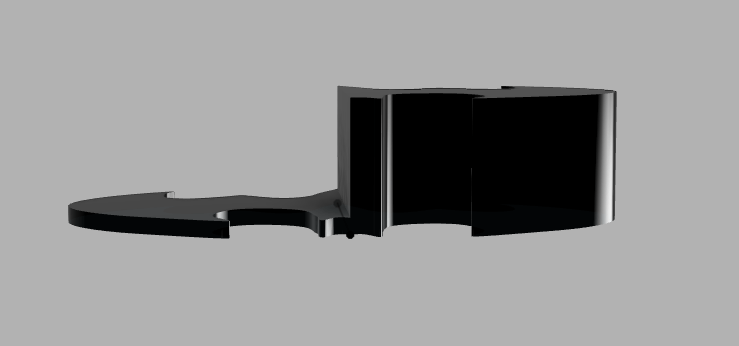
For this door stopper I wanted to get a little creative with the design and try something that does not resemble a typical door stopper but would still serve its purpose as one. Since I am a fan of batman I decided to import a picture of the batman logo through the canvas feature that we learned how to utilize when making the bowler hat on Fusion 360. I then utilized the spline feature to outline half the shape of the logo and then mirror the other half so it would come out symmetrical when rendered. At first I tried to make the designed wedged, utilizing the draft feature so the logo would incline but it kept saying error when I tried to do it. Since the draft feature would not work I decided to take a different approach. I extruded the object so the smaller half of the object would be positioned under the door and the larger side would stop the door from moving.
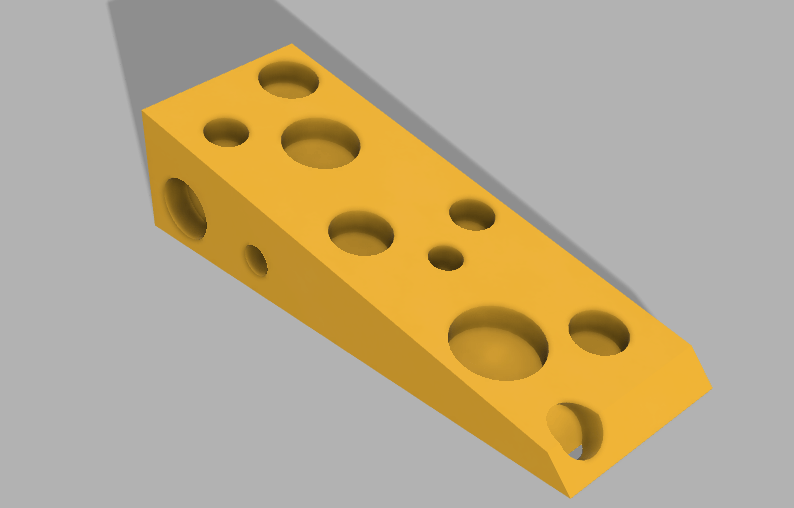
The last design that I wanted to make was a “cheesy” door wedge. I made a typical wedge, drafted one of the faces, and extruded holes on all the surfaces so that it could resemble a cheese wedge. I made a door wedge that I would most likely to physically print due to its fun design.
For all of these objects I utilized the Fusion 360 software so I could render the object and change its appearance. Through this assignment I was able to learn more about the different features that the software has to offer and that we have not utilized in the past (such as the draft, mirror, and fillet feature). Although I consider myself to be one of the “struggle bus students” I tried my hardest on this assignment and made objects that I would like to print in the future. One of the hardest parts of making the objects was making each shape with the correct measurements so it could print correctly and would be able to function properly. I had most difficulty making the batman logo door stopper because I was not able to use the draft feature properly. Figuring out the measurements for my object and making them precise on the software was also very time consuming and frustrating.
Part B


Model 1: Tutorial shape
This shape was very easy to complete since there was a tutorial with step-by-step directions. Completing this shape was a good introduction to learn about this particular software and the features of the software.
Model 2: Lampshade


The lamp shade was a good introduction on using the revolve feature on fusion 360. I liked making this object because I had more creativity on making it and did not have to follow a set tutorial in order to achieve this outcome. It also helped me familiarize with the spline tool which proved to be useful for the bowler hat. I had to make my shape twice because the first time it did not really resemble a lamp shade and I wanted to make mines as close as to a lamp I have in my house. I also liked that I was able to play around the with the appearance function and change the fabric of the shade.
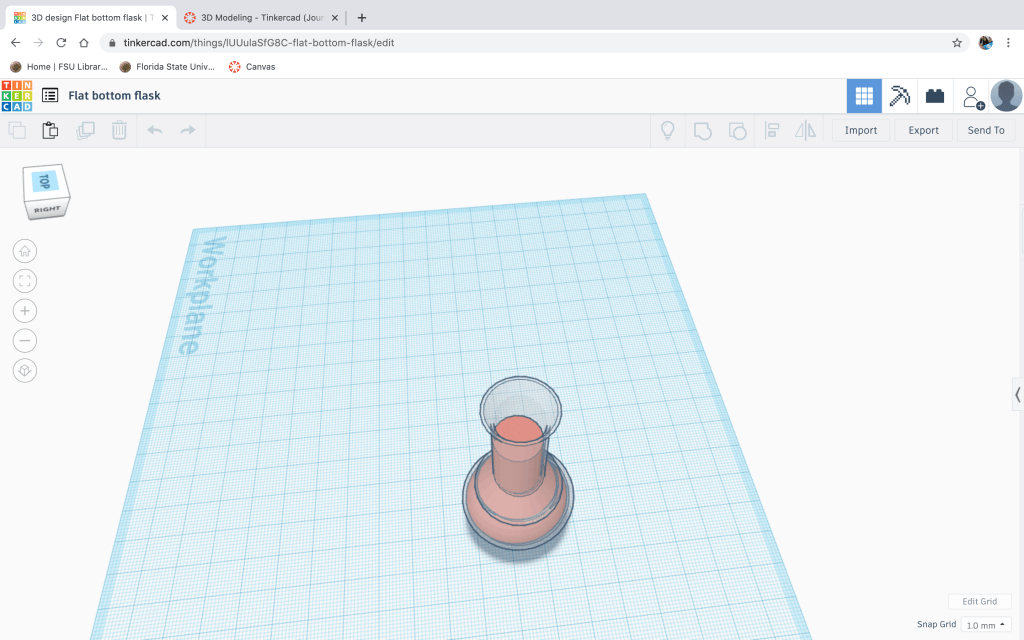
Model 3: The flask

Making the flask was one of the hardest shapes due to the different components and the exact measurements that had to be perfected when sketching out the object. Although I thought this object would be easy to make since we did it on Tinker-cad, I was severely mistaken. It took me a couple of attempts to make this object because when trying to revolve the flask, the lines that I made did not connect and it did not let me revolve only the sides of the flask. Also, once I revolved the glass component of the flask, it took me a couple of attempts to edit the sketch. I had to make sure the lines were precise in order for it to actually look like a flask. This object was also useful in figuring out how to use the fillet tool. I got lost in class trying to make the shape so I attempted it in a variety of ways until it turned into a decent looking flask.
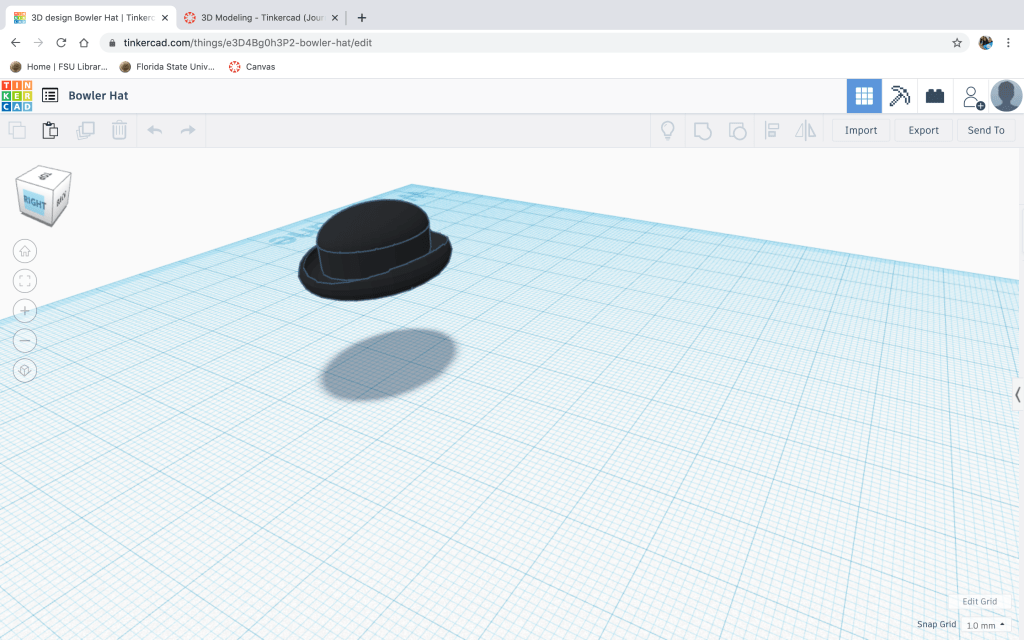
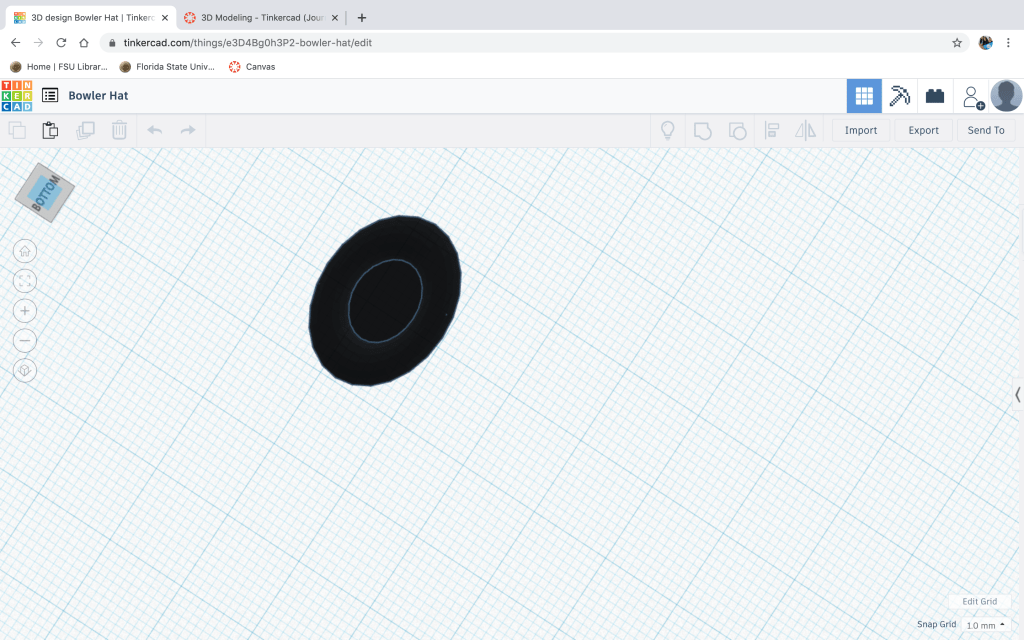
Model 4: Bowler Hat
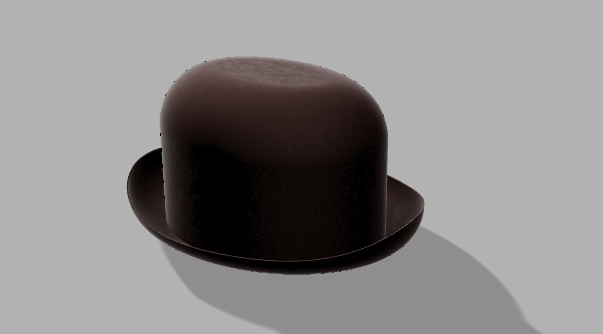

If I thought the bowler hat was hard I was in for a surprise. Completing model 4 was the hardest of all the models due to the lack of instructions or guidelines on how to complete the bowler hat. Although doing the object on Tinker-cad did help me prepare for creating the object on Fusion 360, it was much more difficult because there was was no set way on designing the model. It involved using a variety of features, what helped the most was uploading a picture of a bowler hat from google to get an idea on how to measure my hat, and knowing what height to give it. Uploading the canvas allowed me to measure the proportions to make it look relatively similar to a bowler hat.
Overall I am so glad to be done using this software. This software was a little less complicated than Fusion 360 because i was able to manipulate the object more to my desire. For example on tinker cad there was not much I can do to change up the object. What I liked about Fusion 360 was that I could render the object to make it look more life-like. This software also lets you show or hide either the body or sketch, allowing me to be more efficient when creating my object. The canvas feature was also very helpful in getting my object to look as close as the object I wanted to create.
When thinking of what in my life could be solved immediately with a 3-D printed object I thought about the door in my room that does not stay open. I always have to keep an object by my bedroom door so it could stay open, especially since the airflow into my bedroom is not the best. If the door is kept closed, air does not enter the room and it feels like a sauna, hence why I sleep with the door open. I always keep either a shoe, a bottle of water, or anything in reach to prop the door open. A 3-D printed object that could solve this problem is a door wedge, which will allow the door to stay either opened or closed. It is always annoying when I have to place an object to keep the door open considering all the other doors in the house stay open. A door wedge is a perfect solution.

Object 1- Tutorial

Object 1 was one of the most time-consuming tasks to complete but also one of the easiest objects, I was able to complete this object faster and more successfully than I originally thought I could. Although time-consuming, this object was relatively easy to complete, considering we did it in class multiple times and there was a step-by-step tutorial both in written and video form. I would say the hardest part was pocketing the rectangle through the object. It took me a while to redefine the lines at the end because I could not find the feature but I ended up completing the tutorial successfully.
Object 2


Object 2 was also relatively simple to make in comparison to the other objects.I used the idea that you showed us in class, and added a second hole to be able to clip more than one cable at a time. I also changed the measurements so it could fit my desk and I made the length longer to add space for a second hole. I also tried to play around with the different features on Freecad and changed the corners. I tried to play around with the fillet and chamfer feature on the software, while also redefining the lines in the pockets.
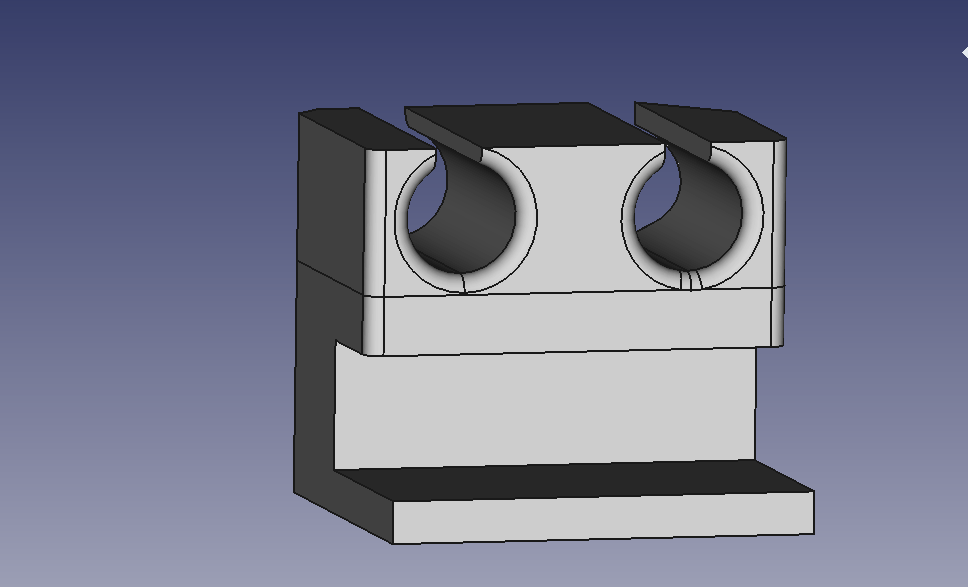
Object 3- Interlocking pieces- Lego Pieces


When first introduced to the object and given the instruction to create two interlocking objects, the first thing I thought of was Lego pieces. Originally I had tried to create a puzzle piece, but I was unsure if it would interlock when held in every position. As a child, I would always play with Legos, so I thought it would be perfect to bring it to life through this software. I thought creating these two Lego pieces on Free-cad would be easy but I was wrong. The part I had the most trouble with was getting the measurements exact so the two pieces would be able to interlock and line up appropriately, I also had difficulty centering all the circles throughout the block. Although It took me a while to create all the shapes I am pretty content with the outcome. It took many attempts to create every object, but through trial and error, I was able to finish the objects.
Working with Tinkercad has been an interesting experience. I went into this unit thinking it would be manageable and relatively simple to use, but I found it pretty complex to make these shapes. When first attempting to use the software, making the PVC pipe was easy, I was able to complete it with no difficulty, making me think it would be easy to make the rest of the shapes, but I was mistaken. Creating the egg was also sort of complex for me because it was the first shape where we utilized the void and got to know how it works in terms of creating a hollow effect. It was very difficult for me to create the indented part of the spoon but after a lot of time and effort, I was able to make a spoon that I would be able to use in the real world. Although this unit was difficult for me it was very interesting to not only conceptualize these shapes but also create a basic object with a multitude of different shapes.
The hardest part of this unit was being precise with the placement of the shapes. When I was creating these shapes I had to make sure that the shape was placed correctly and confirm by turning the trackpad on all 4 sides. I think I was able to make the shapes how I wanted (for the most part) and tried my hardest to make it look like the object I was trying to re-create. I also realized that there are many limitations to the app, which is why other softwares are probably better for creating 3-D objects. I tried my hardest while attempting these objects and hopefully I was able to re-create it to your standards.


In our group, we were able to fully conceptualize our app design while already adding screens that would allow the user to run the stimulation. For our app we want to describe the psychological process of classical conditioning in a fun and educational manner. Our group has been able to come together and provide different contributions to the app. For example Catalina was responsible for the application idea and concept, while I am responsible for the writing involved in this project (ranging from the texts utilized in the game and note taking). Our progress is coming along, so far we have the majority of the screens functioning the way we want it to, with the blocks of each screen also being done. We are missing a couple of screens that allow the user to fully run the stimulation and learn about the process.

